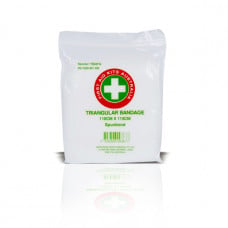
Triangular bandages are usually made from a metre square of cotton or calico that is cut in half diagonally. The bandage can be used in various ways as a sling or for immobilisation of broken bones and soft tissue injuries. The non-woven triangular bandage is a cost effective lightweight, single use disposable bandage. Can also be used for padding and immobilising but is designed for single use. You can also fold the bandage point towards the longer length to make a broad fold bandage for splinting
Youtube video: How to use the traingular bandage.
Sling
- In the open form as a sling to support an upper body injury.
- Great little Step by Step guide on how to make an arm sling.
Broad-fold bandage
- As a broad-fold bandage with the apex folded down to the base twice to immobilise a lower body injury.
Narrow-fold bandage
- As a narrow-fold bandage with the broadfold bandage folded in half to control severe bleeding, or for immobilisation of a lower limb.
- As a collar-and-cuff sling for an upper body injury.
Pad
- As a folded pad after the ends of the narrowfold bandage have been brought into the centre three times, and for use on a major wound or as padding.
Tying a reef knot with a triangular bandage
When using a triangular bandage it is important to use a reef knot to secure it in place. A reef knot is a flat knot that will not slip undone and, if correctly placed on the body, is comfortable for the patient.
- Wrap the left end of the bandage over and then under the right end to start the knot.
- Wrap the right end over and then under the left end to complete the knot.
- Pull the knot tightly from both sides to ensure that it will lie flat.
It is easy to untie a reef knot without jarring or hurting the patient. Simply choose two paired ends as they come out of the knot at one side. Then pull the ends apart steadily until two loops form and can be slipped off one end.
Arm sling
This sling is used to support a lower arm or hand
injury and for rib or collarbone fractures.
- Encourage the patient to hold the affected arm across the body in the position of greatest comfort.
- First hold the bandage with the base running down the centre of the body and the point to the elbow on the affected side. Gently slip the top point under the supported arm and wrap it around the back of the neck until it rests on the shoulder of the affected side.
- Lift up the lower point and take it to meet the upper point at the side of the neck on the affected side.
- Use a reef knot (see above) to tie the ends together just above the collarbone to avoid any pressure on the back of the neck.
- Adjust the sling so that the fingertips are clearly visible and then bring the point forward and fasten it to the sling with a safety pin.
- Finally, check the circulation in the fingers and compare the tissue colour with the fingertips on the unaffected arm. If there are any signs of an impaired circulation, loosen or remove the sling and any underlying bandages.
Elevation sling
This sling is used for an arm or finger injury where the patient needs the hand and arm to be held in an elevated position.
- Encourage the patient to hold the affected arm across the body with the fingers pointing to the opposite shoulder tip.
- First hold the bandage with the base running down the centre of the body and the point to the elbow on the affected side. Gently place the bandage over the supported arm and carry the top end around the front of the neck until it rests on the unaffected shoulder.
- Gently wrap the lower half of the bandage along the affected arm. Carry the free end of the bandage from the elbow across the back to the opposite shoulder tip.
- Gently twist the top point around the fingers, but avoid placing pressure on any injury. Tie the two ends together with a reef knot (see above) and place it just above the collarbone to avoid any neck pressure.
- At the point of the elbow smooth the loose fabric forwards along the arm under the sling. Secure the sling firmly at the elbow with a safety pin or tape.
Collar-and-cuff sling
This sling is used to hold the lower arm and hand in an elevated position where a full elevation sling is either not required, or for patient comfort in very hot weather. The sling is made with a narrowfold bandage used as a clove hitch.
- Make a clove hitch with two large loops of the bandage. One loop is made with the bandage end pointing upwards and the other end pointing downwards.
- Fold the two loops inwards towards the middle, ensuring that both ends are trapped between the loops.
- Encourage the patient to hold the affected arm across the body with the fingers pointing to the opposite shoulder tip. Then gently slide the two loops over the hand and lower arm with the ends hanging downwards.
- Carry the two bandage ends up on either side of the limb and around the patient’s neck.Adjust the bandage so that it is possible to tie a
reef knot (see above) just above the collarbone on one side to avoid any pressure on the neck.
- The knot may be placed on either side of the neck depending on the location of the injury and the comfort of the patient.
Important
You must not rely on the information on this site as an alternative to medical advice from your medical physician or other qualified healthcare provider. Consult your healthcare provider immediately if you think that you may have a medical emergency or for the diagnosis and treatment of injuries. Always seek the advice of your physician or other qualified healthcare provider before starting any new treatment or with any questions that you may have regarding a medical condition or injury.


